How To Run A Validator Node On Shardeum Sphinx
Here are steps on how to run a validator node on Sphinx to validate and perform consensus on transactions in return for testnet...
Explore the Future of Web3: Shardeum's Whitepaper Released!
Here are steps on how to run a validator node on Sphinx to validate and perform consensus on transactions in return for testnet...
Running your own validator:
-enhances Shardeum network security
-earns testnet SHM from user transaction feesShardeum validators perform consensus on transactions.
Shardeum validators with honest transaction consensus earn testnet SHM.
Shardeum validators with dishonest transaction consensus will have their testnet SHM slashed.
INFO
Estimate future validator rewards using the Node Reward Calculator
-250 GB SSD storage
-Quad core CPU less than 10 years old if self hosting
-Dual core CPU works if hosted with newer Xeons / EPYC
-16 GB of ram,  4+ GB of virtual memory recommended
-Hosting: 8 GB RAM + 8 GB Virtual MemoryAccess the terminal interface for Shell CLI commands:
(Press at the same time)
Ctrl + Alt + T(Press at the same time)
Command + Space bar
(Type)
Terminal We will use curl in this tutorial to download files:
INFO
Mac comes with curl, so we will install homebrew with curl (which will handle handle packages like apt in Linux).
sudo apt-get install curl/bin/bash -c "$(curl -fsSL https://raw.githubusercontent.com/Homebrew/install/HEAD/install.sh)"add Homebrew to your PATH:
echo 'eval "$(/opt/homebrew/bin/brew shellenv)"'
eval "$(/opt/homebrew/bin/brew shellenv)"Make sure your packages are up to date first:
INFO
When you add sudo to a command, the output will ask for your system password for admin verification.
sudo apt updatebrew updateInstall docker with docker.io:
sudo apt install docker.iobrew install dockerCheck that docker is working with (should return version 20.10.12 or higher):
docker --versionCurl request docker-compose:
sudo curl -L "https://github.com/docker/compose/releases/download/1.29.2/docker-compose-$(uname -s)-$(uname -m)" -o /usr/local/bin/docker-composebrew install docker-composeSetup permissions for docker-compose:
sudo chmod +x /usr/local/bin/docker-composeCheck that docker-compose is working with (should return version 1.29.2 or higher):
docker-compose --versionTIP
Shardeum Validator support on Windows will be coming in the future.
Run:
curl -O https://gitlab.com/shardeum/validator/dashboard/-/raw/main/installer.sh && chmod +x installer.sh && ./installer.shThe terminal will ask questions about your setup settings.
Give permission to collect validator data for bug reporting:
By running this installer, you agree to allow the Shardeum team to collect this data. (y/n)?:Enter y to set up the web-based dashboard:
Do you want to run the web based Dashboard? (y/n): y Set a password for dashboard access:
Set the password to access the Dashboard: Add a custom session port for the web-based dashboard or hit enter for port 8080:
Enter the port (1025-65536) to access the web based Dashboard (default 8080): Add a custom external IP address or use an automatically detected IP address:
If you wish to set an explicit external IP, enter an IPv4 address (default=auto):Add a custom internal IP address or use an automatically detected IP address:
If you wish to set an explicit internal IP, enter an IPv4 address (default=auto): Set the first p2p port (default 9001):
To run a validator on the Sphinx Validator 1.X network, you will need to open two ports in your firewall.
This allows p2p communication between nodes.
Enter the first port (1025-65536) for p2p communication (default 9001):
Set the second p2p port (default 10001):
Enter the second port (1025-65536) for p2p communication (default 10001):Add a custom path or install to root:
What base directory should the node use (defaults to ~/.shardeum): Wait for the installation process to complete.
CAUTION
If you are behind a router and you are using ports 9001 and 10001 for p2p communication, make sure ports 9001 and 10001, are forwarded (be careful doing this since it will modify your firewall).
Router port forwarding example with AT&T:
https://www.att.com/support/article/u-verse-high-speed-internet/KM1010280/
More info on router port forwarding:
https://www.noip.com/support/knowledgebase/general-port-forwarding-guide/
Reference:
https://gitlab.com/shardeum/validator/dashboard/
Make sure you are in the root directory by running:
cdGo to the hidden Shardeum directory:
cd .shardeumStart the CLI by running the following shell script:
./shell.shIf you see docker container error:
Error response from daemon: Container <container_id_hexadecimal> is not runningstart all docker containers until the errors go away:
docker start <container_id_hexadecimal>If you see docker permission error:
Got permission denied while trying to connect to the Docker daemon socket at
unix:///var/run/docker.sock:
Get "http://%2Fvar%2Frun%2Fdocker.sock/v1.24/containers/shardeum-dashboard/json":
dial unix /var/run/docker.sock:
connect:
permission denied
run:
sudo usermod -a -G docker $USER && newgrp dockerif that does not work, also try:
sudo service docker start then try to start the shell script again.
While inside the shell script, run:
operator-cli gui startGo to your web browser and go to:
https://localhost:8080/https://<server_ip>:8080/
CAUTION
You might see a warning page when trying to access this address in your web browser. Ignore this warning and continue to the validator dashboard. Another way to work around this warning:
From the three bar button (hamburger) menu button, go to Settings

Click on “Privacy & Security” on the left.

Scroll down to locate “View Certificates” and click that button.

Click the “Servers” tab, then click “Add Exception”.

Type: “https://localhost:8080” (or your remote/VPS server’s IP and port),
then click “Get Certificate”, then click “Confirm Security Exception”.

The result should be the server/localhost in the list, click “OK”.

Refresh the operator dashboard page and the certificate error should be gone.Click on the “Not secure” alert and select/click on “Certificate is not valid”.
Click on the “Details” tab, then click n “localhost” in the “Certificate Hierarchy” box and click the “Export” button.
Click on the “Details” tab, then click on
“mynode-sphinx.shardeum.local” in the “Certificate Hierarchy” box and click the “Export” button.
The result of the steps above are two certificate files save in a location to be used in the following steps.
Type: chrome://settings in address bar, hit enter.
Click on “Privacy and security” on the left menu. Then click “Security” from the list in the main window.
Scroll down to find “Manage device certificates” in the main windows and select it.
Click the “Import” button.
Follow the import prompts.
Place the ‘mynode-sphinx.shardeum.local.crt” in the “Trusted Root Cert… Auth..” folder.
Click “Yes” and then “OK”.
Click “Import” once more.
Then follow the import prompts.
Place the ‘localhost.crt” in the “Personal” folder.
Close all Chrome windows (as in Exit Chrome).
When you have successfully restarted chrome, the operator dashboard will not show with a white lock.You will be asked for your password set during setup.
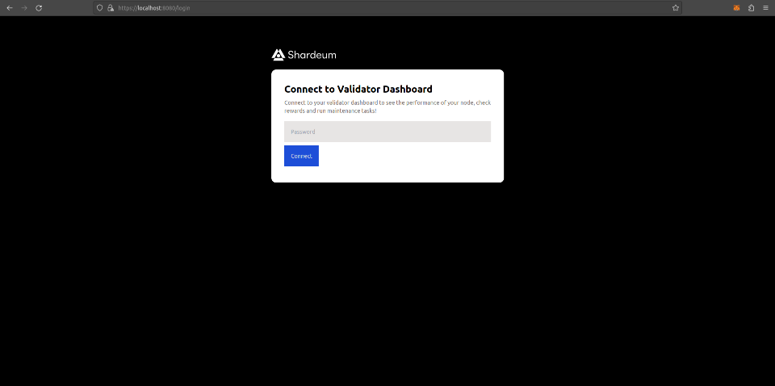
DANGER
The login will fail even if you put no password during the setup process. To set a new password inside the validator CLI:
operator-cli gui set password <type_new_password__here>You should see the “Overview” page for the Shardeum Validator Dashboard in your web browser:
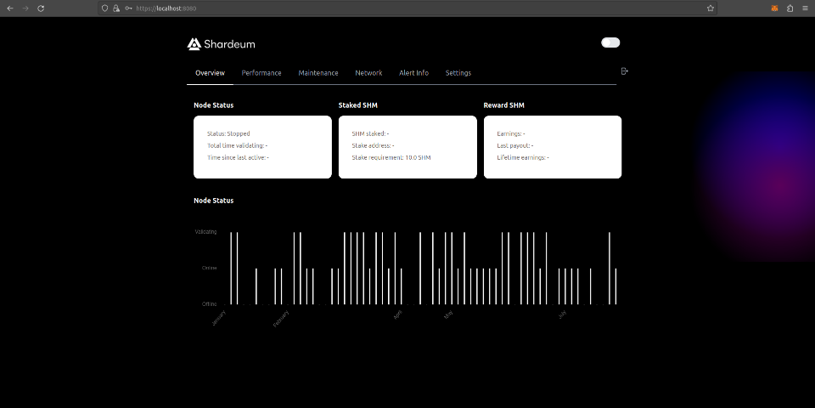
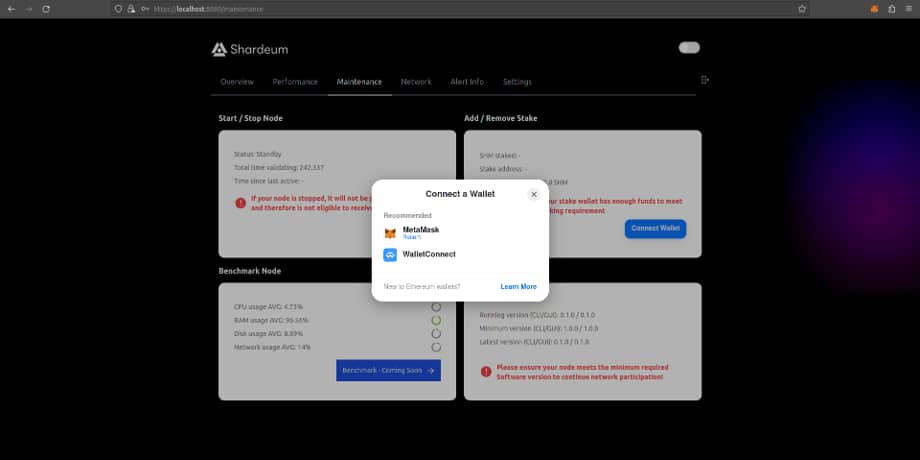
Go to the “Maintenance” page, then click the “Start Node” button in the top left white box:

(Same as running)
operator-cli startWait and refresh the page.
The node is running correctly if the “Start Node” button now says “Stop Node”. If you want to stop the node with the CLI:
operator-cli stop
Go to “Performance” to see your node’s hardware performance here:
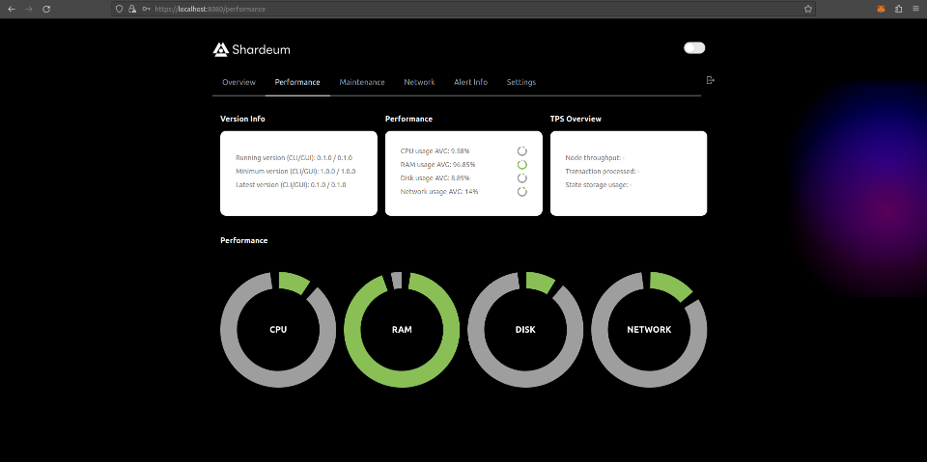
For more details about your node status run the following inside the CLI:
operator-cli statusDANGER
If your node becomes inactive, try checking its status.
pm2 listReset the validator from the list by running:
pm2 delete [id]Connect to Sphinx 1.X with your wallet by clicking the button linked here
Shardeum Twitter SHM Faucet Guide for Sphinx 1.X
After you start the validator, go to the “Settings” page. You will be asked to connect your wallet:
After you connect your wallet, you should see the following:

When you click “Add Stake”, you will see the following:

-Stake Wallet Address [wallet connected]
-Nominee Public Key [filled in automatically while validator is running]
-Stake amount (SHM) [empty and is in units ether not wei]
This example has filled in 10 SHM tokens to stake.
TIP
It is recommended to stake just 10 SHM per Validator node, since rewards will be the same with 10 SHM or more staked for a Validator.
Once all fields are filled, click the “Stake” button.
Your wallet will ask you to sign the transaction stake your SHM.
Once the transaction is signed and complete, you have staked your SHM tokens successfully.
TIP
If your node status is on Standby and you have 10 SHM or more staked, your validator node is setup correctly.
The network will automatically add your validator to be active in the network.
The time to be added as an active validator will vary based on network load and validators in the network.
CAUTION
If you have staked before, you can “Remove Stake”. However, you will stop getting testnet SHM rewards when you unstake.
If you see your validator IP address as “0.0.0.0”:
Go into the operator dashboard docker (may be different if you customized install location:
cd ~/.shardeum
./shell.sh
Get your node’s external IP:
curl https://ipinfo.io/ipThe returned IP in the format of nnn.nnn.nnn.nnn is your EXTERNAL_IP.
Set the number above in place of EXTERNAL_IP:
export APP_IP="EXTERNAL_IP"You can also stake and unstake from the Validator CLI if you are not able to access a web browser for the Validator GUI.
First, set your private key in your Validator CLI:
WARNING
Be very careful with your private keys. We recommend you use a private key which has testnet tokens only to be safe.
export PRIV_KEY=<private_key>make sure your private key is stored in your Validator CLI by running:
echo $PRIV_KEYadd stake with:
operator-cli stake 10check your stake amount with:
operator-cli stake_info <wallet_address>remove stake with:
operator-cli unstakeNew validator versions will be released over time. It is necessary to keep your validator updated by checking the minimum version required and your current version periodically.
Run:
curl localhost:9001/nodeinfocurl <server_ip>:9001/nodeinfoexit
cd ..curl -O https://gitlab.com/shardeum/validator/dashboard/-/raw/main/installer.sh && chmod +x installer.sh && ./installer.sYou might manually have to start the GUI afterwards with:
Shell
operator-cli gui startsudo docker exec shardeum-dashboard cat cli/build/logs/exit-summary.jsonNavigate to the .shardeum directory by entering:
cd .shardeumExecute the shell.sh script by entering:
./shell.shWith the Validator CLI running, navigate to the cli/build/logs directory by entering:
cd cli/build/logsView the contents of the exit-summary.json file by entering:
cat exit-summary.jsonRun:
operator-cli versionRun:
operator-cli updateTo see all CLI commands, run:
operator-cli --helpUseful if your validator is outdated and you want to clean your last installation.
You can delete the validator folder while in your root directory with:
rm -rf .shardeumYou can also delete docker containers and images that the Shardeum validator was using.
These commands will delete all docker images and containers on your computer!
Delete all docker containers:
docker rm -vf $(docker ps -aq)Delete all docker images:
docker rmi -f $(docker images -aq)Note : This blog was originally published on Shardeum’s docs page of the website here. Follow the link for latest updates on how to run a node and how to build on Shardeum!
With GUI, you can start running a node with a few clicks of your mouse. Shardeum is one of the first L1 networks to enable user-friendly GUI feature for node validators. CLI is the primary interface used by the vast majority of blockchain networks. It is enabled for more advanced users and developers who intend to work with nodes more deeply and technically
Your node will earn Betanet SHM, but these will not have any value. That said, we will be keeping track of the addresses that helped out during Betanet. While we haven’t yet decided on Mainnet rewards for Betanet users, we’ll announce in due time if and when it is decided.
When you have the needed amount of SHM staked and you start your node, your Node starts with a Standby status. This means that it is ready to be included in the network. Whenever network rotation occurs, your node will get the opportunity to become Active. This will entirely depend on the network demand and there is no fixed timeline when your node will become Active.
Please Reset your Metamask Wallet. (Settings > Advanced > Reset Account)
While the team has not done extensive testing on windows, technically if you have Windows Subsystem for Linux (WSL) in your system, you should be able to run a Shardeum validator node.
Run the following command in your shell –>
sudo usermod -a -G docker $USER && newgrp docker
Then run the shell script again.
Go into the operator dashboard docker (may be different if you customized install location:
cd ~/.shardeum
./shell.sh
Get your node’s external IP:
curl https://ipinfo.io/ip
The returned IP in the format of nnn.nnn.nnn.nnn is your EXTERNAL_IP.
Set the number above in place of EXTERNAL_IP:
export APP_IP=”EXTERNAL_IP”
Use the following commands in your shell:
cd ~/.shardeum
./cleanup.sh
cd ~/
rm -rf .shardeum
rm installer.sh
After these, Start from Step 2 from the Validator Node Installation Guide (https://docs.shardeum.org/node/run/validator#step-2-download-and-install-validator)
During betanet the community can operate Validator nodes. After mainnet, the community can also operate Archiver nodes.
Popular Searches
DAO Guide | Blockchain Beyond Crypto | What is Chainlink | What are Cryptopunks | Advantages and Disadvantages of Decentralization | Peer to Peer Transaction | Web3 Training | Blockchain Proof of Work Vs Proof of Stake | What is Defi 2.0 | What is Phishing and How to Prevent it | Main Features of Web 3.0 | Blockchain Layers Explained | Cryptocurrency Liquidity Provider | EVM Wallet Address | EVM Blockchains Add EVM Network | Custodial Wallets Vs Non Custodial Wallets | Decentralized Identifiers | Cryptocurrency Career Opportunities | What is Consortium Blockchain | Major Components of Blockchain

Sign up for The Shard community newsletter
Stay updated on major developments about Shardeum.
Share
Shardeum has acquired over 800,000 testnet users and crossed over 36,000 validator nodes making it one of the largest decentralized testnet...
Shardeum has automated the EIP-2930 access lists on its testnet for network RPC nodes to route shards. This blog is primarily for educational purposes so developers can use it if...
IPFS and Filecoin together are used for the decentralized storage for large data...