Shardeum Staking Guide: How to Delegate SHM and Earn Rewards
Learn how to delegate SHM on Shardeum, choose reliable validators, and earn staking rewards. A step-by-step guide for beginners and existing...
Learn how to delegate SHM on Shardeum, choose reliable validators, and earn staking rewards. A step-by-step guide for beginners and existing...
The Shardeum Delegators Program is now officially live!
📌 Estimated Delegator APY: ~52%
📌 Network inflation: ~1%
📌 Validator Commission: ~6.4% (avg.)
📌 Unbonding period: 21 days
📌 Gas Fee (per each transaction event): ~800 SHM (~$0.16)
📌 Foundation-run validators are clearly labeled on the dashboard
📌 Wallet Support: Keplr, MetaMask
Note: APY is not fixed and will adjust over time as total network stake and other parameters change. Refer FAQ for more details
Already familiar with delegation and staking on typical blockchain networks? Here’s everything you need for an instant start on Shardeum in 3 steps:
Shardeum’s staking module automatically claims your pending rewards before updating your delegation.
A unified transaction history view will be available soon. For now, here are the formulas to validate your rewards:
✅ Wallet balance verification:current_balance = old_balance + claimed_reward - tx_fee
✅ Claimed reward estimation:claimed_reward = additional_stake + tx_fee + current_balance - old_balance
No. Rewards are not auto-compounded into your delegation. They are always sent to your wallet unless you manually redelegate them.
Validator rewards come from a fixed inflation schedule and transaction fees. As more SHM is staked across the network, total rewards are shared among a larger pool of delegators. As noted previously, APY is influenced by several factors and is not guaranteed, nor does it imply that rewards will continuously decline. For example, increased network activity can generate more transaction fees, which may partially offset APY dilution as staking participation grows. This is a standard behavior across Proof-of-Stake blockchains.
Here are illustrative estimates based on current parameters and ~1% inflation rate:
| Total SHM Staked on Network | Approx. Annualized APY |
|---|---|
| First 430 million SHM | ~218% APY |
| At 600 million SHM | ~134% APY |
| At 1 billion SHM | ~67% APY |
Rewards do not auto-compound by default. To move closer to the estimated APY, delegators can periodically claim their rewards and re-stake them (for example, on a monthly basis). Re-staking simply means adding your earned rewards back into your staked amount.
By re-staking earned rewards, you introduce a compounding effect, which can increase overall returns over time. Under stable network conditions, this can bring your actual returns closer to the estimated APY.
When you choose to undelegate SHM – either to stop staking or to move to another validator – the following steps occur automatically:
This mechanism protects network integrity while giving delegators full control of their tokens at all times.
There is no minimum amount required to stake or delegate SHM.
However, it’s recommended to always keep around 800 SHM as a buffer in your wallet to cover transaction fees. This ensures you can smoothly perform delegation-related actions – such as claiming, staking, re-staking reward, or undelegating – on Shardeum’s staking dashboard without interruptions.
We strongly recommend delegating to Foundation Validators during the early phase of the program for:
Foundation-run validators are now clearly labeled in the dashboard as you see in this screenshot.
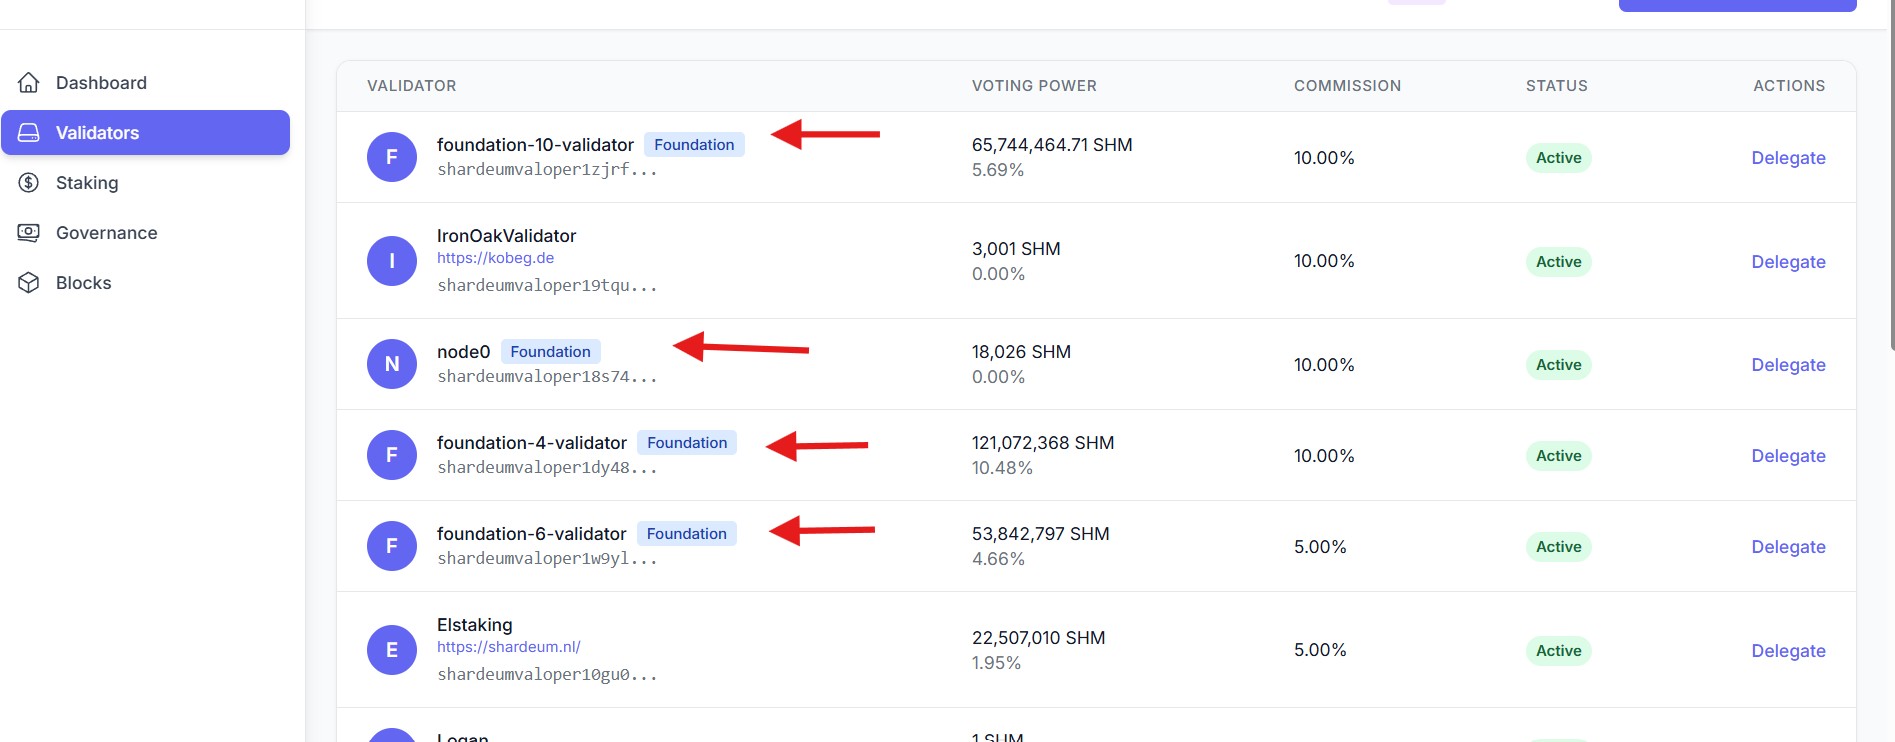
As the ecosystem matures, you can definitely delegate to non-foundation validators. In fact, it helps increase decentralization and validator diversity over time.
Yes, community members can run validator nodes and other node types on Shardeum, with developer documentation available to guide setup and ongoing operations.
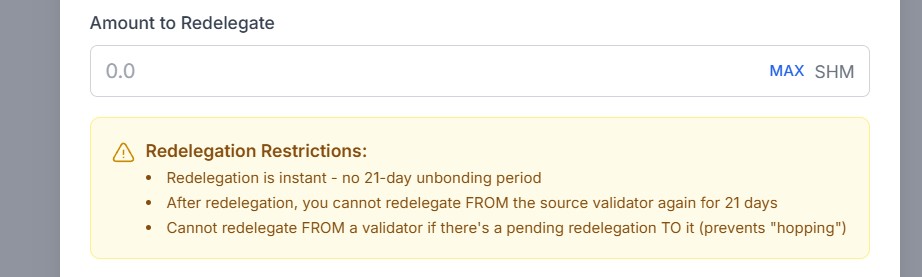
Re-delegation lets you move your staked SHM from one validator to another without unstaking first. Your tokens remain staked, continue earning rewards, and do not enter the 21-day unbonding period. However, the re-delegated stake enters a 21-day cooldown during which it cannot be re-delegated again.
Undelegation is used when you want to stop staking or withdraw your SHM to your wallet. When you undelegate, your rewards are claimed automatically, and your staked SHM enters a 21-day unbonding period. During this time, the tokens are locked and do not earn rewards. After the unbonding period ends, the staked SHM also becomes available in your wallet.
You can also follow the official video tutorial to start delegating.
Use this simple calculator to estimate your potential staking rewards. It starts with an example of 100,000 SHM delegated, but you can adjust the values to match your own staking amount. A more advanced calculator will be introduced in a future update.
Estimate net rewards after commission
As of December 16, 2025, we’ve rolled out the following upgrades to the Shardeum staking dashboard to make delegation more accessible and flexible for delegators.
Delegation is one of the easiest and secure ways to participate in the Shardeum network without running a validator node. Delegation allows SHM holders to “loan” their stake to a validator so the validator can participate in securing the network. By delegating SHM, you help strengthen the network’s decentralization while earning a share of validator rewards.
Importantly, delegation does not give validators control over your funds. You retain full ownership of your SHM at all times. This guide walks you through everything you need to know – from choosing a validator to managing your rewards and undelegations.
In Proof-of-Stake blockchains like Shardeum, network security and block production are handled by validators. However, only a limited number of validators can be elected into the active set – typically those with the highest stake (their own + delegations).
This means delegators play a direct role in:
Put simply: Delegation is not just about earning rewards – it’s how the community helps shape and secure the network itself.
You’ll need:
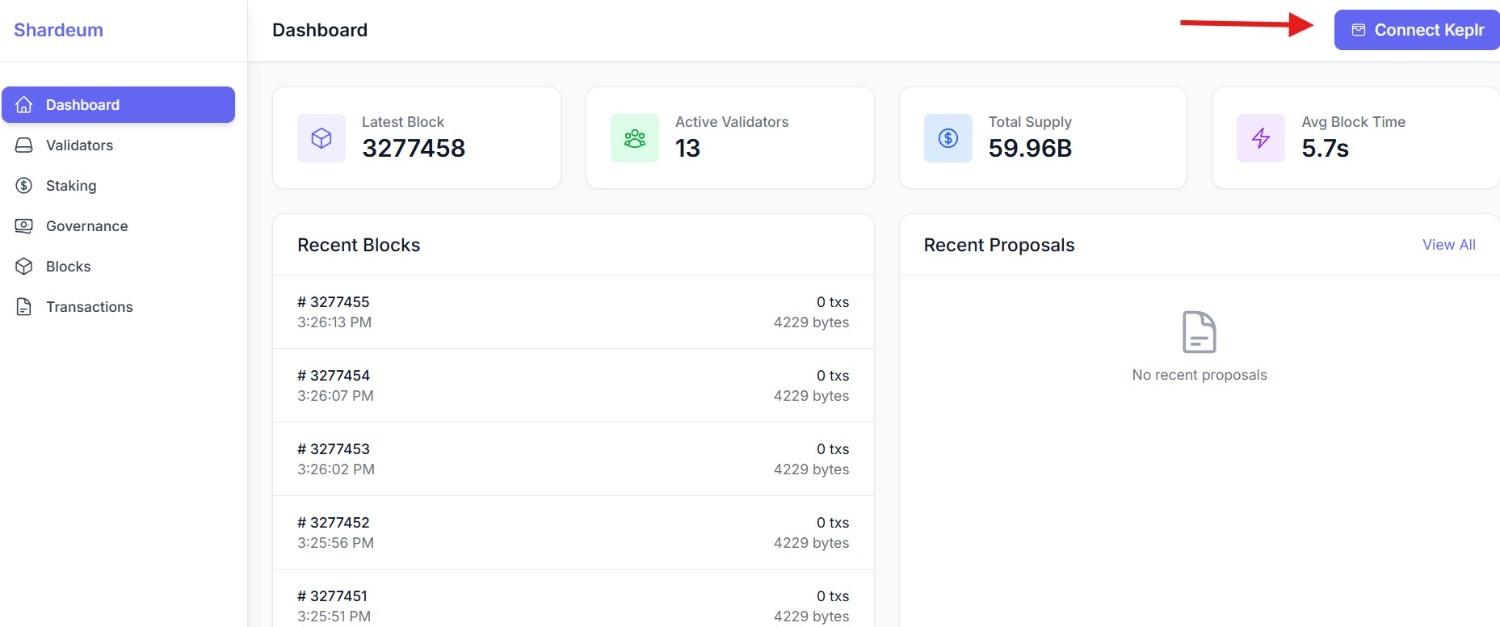
Go to the official Shardeum Staking Dashboard: https://dashboard.shardeum.org/
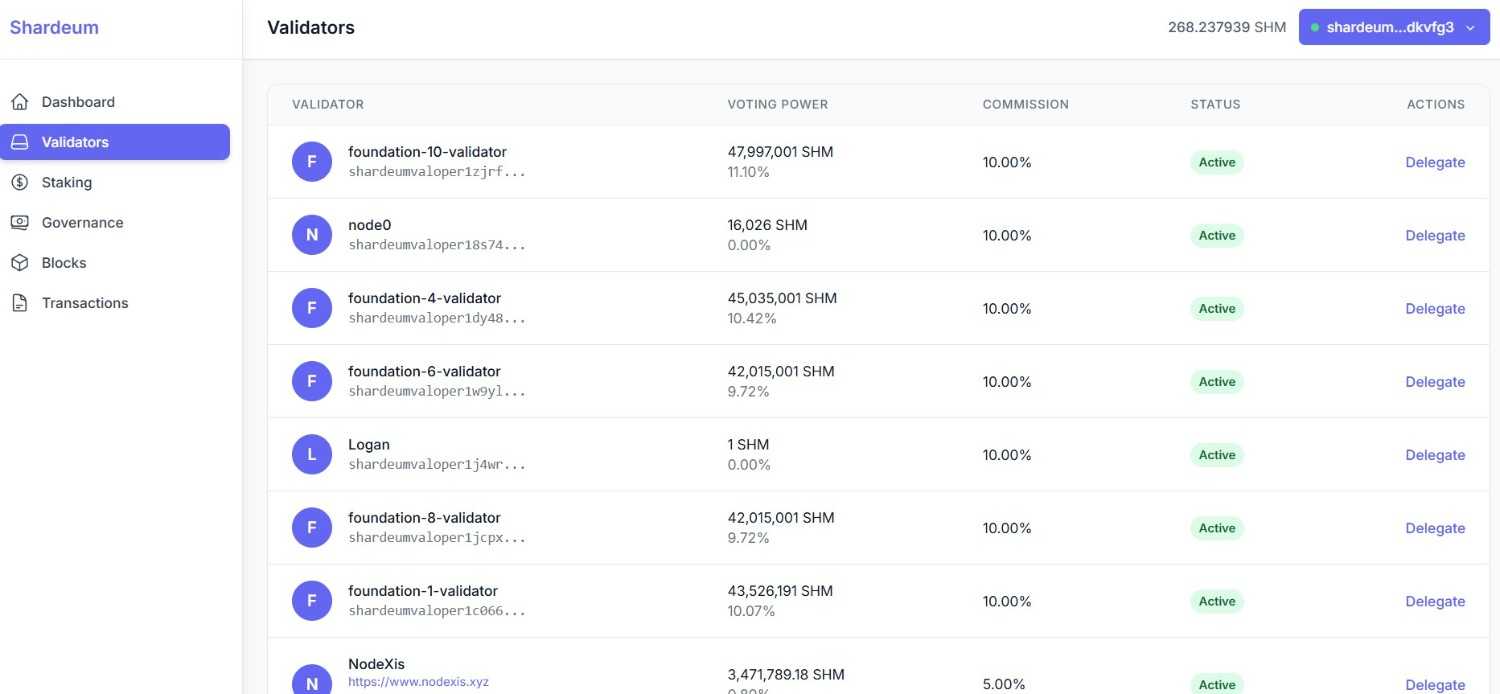
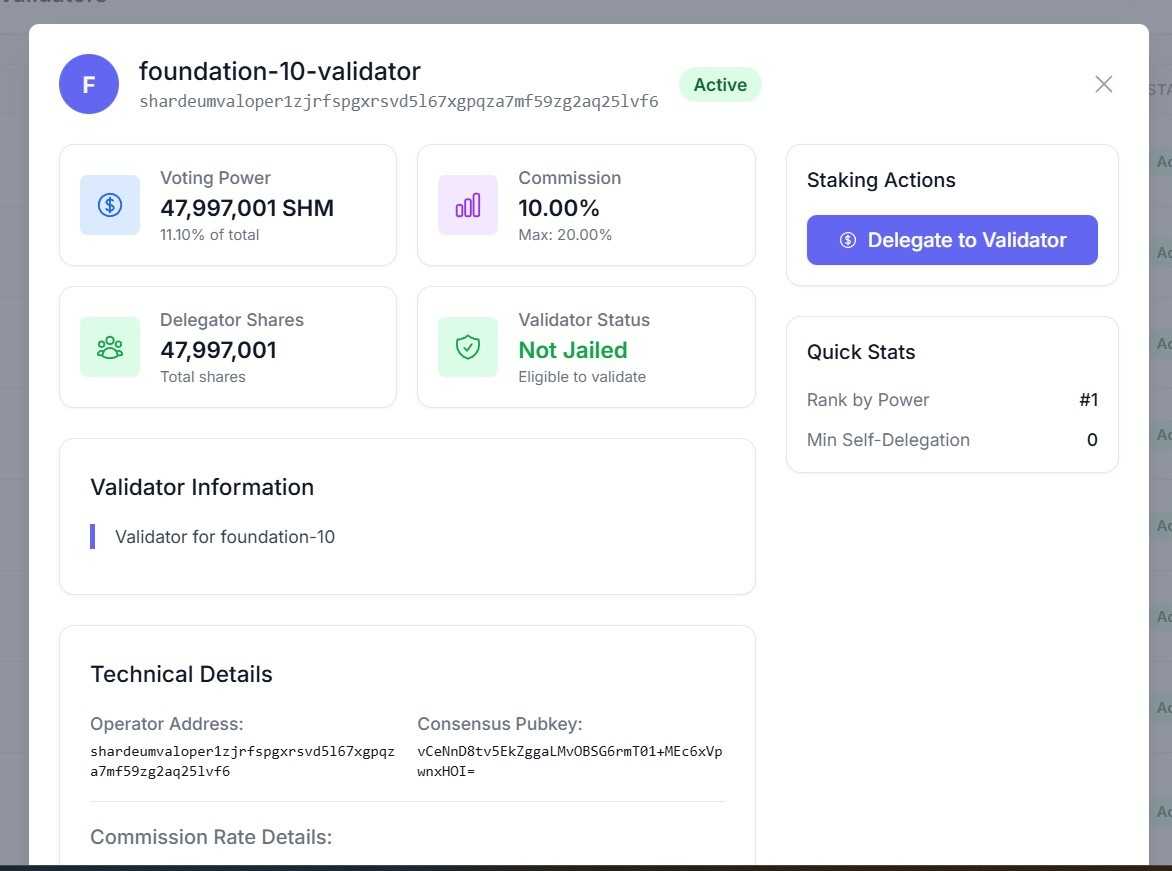
Click Validators in the left sidebar to view all active validators. Here you can see:
To see detailed validator information (ranking, operator address, status, commission breakdown), click on the validator’s row to open the details panel. We strongly recommend delegating to Foundation Validators during the early phase of the program for reliability, which are now clearly labeled in the dashboard. When you’re ready, click Delegate on the right-hand side.
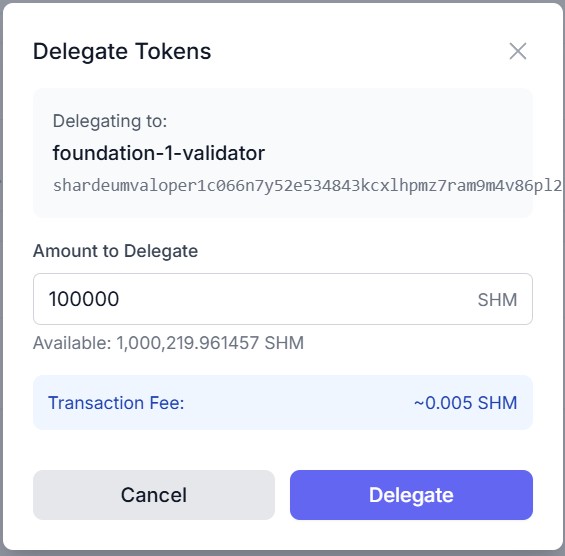
In the delegation pop-up:
Important: Although the estimated gas fee may appear as ~0.005 SHM, the actual gas fee is approximately 800 SHM (~$0.16).
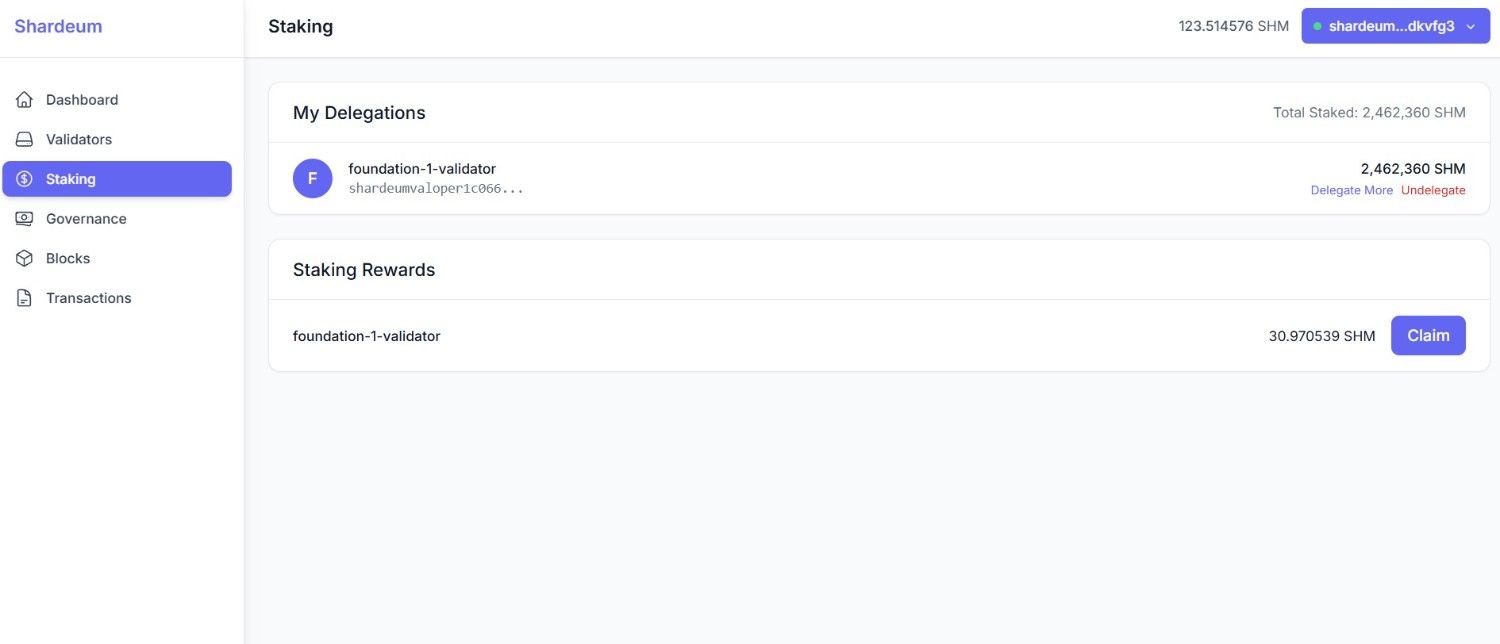
Once confirmed, visit the Staking section on the dashboard to see:
That’s it! Your delegation begins earning rewards immediately after confirmation as shown in the second screenshot.
Rewards accumulate continuously and can be claimed at any time. There is no bonding or lockup period for claiming rewards. Each claim requires a small gas fee (~800 SHM). You can also increase your delegation at any time by selecting Delegate More in the Staking section.
If you want to stop delegating or switch validators, click Undelegate.
When you undelegate:
This mechanism protects network integrity while giving delegators full control of their tokens.
Edits:
Shardeum will pause its token-only chain on Oct 28 and resume with the EVM mainnet launch and SHM redenomination (1:240) on Oct...
Shardeum EVM Mainnet launches Oct 30, 2025 with SHM redenomination at 1:240. Learn what it means for balances, validators, and the...
Vote on the SHM token redenomination proposal ahead of Shardeum’s EVM mainnet launch. Voting window: Oct 6–8,...